Getting Started
Introduction
Auto Mouse is a program designed to relieve the strain associated with excessive use of a computer mouse. It does this by allowing the user to move and click the mouse using the keyboard in a variety of ways.
Installation
Download the installer from the website and run it.
Opening Auto Mouse
Auto Mouse runs automatically every time you log onto your machine. You can see when Auto Mouse is running by viewing the the notification area (system tray) of your Windows taskbar. This is usually on the lower-right of yous screen.
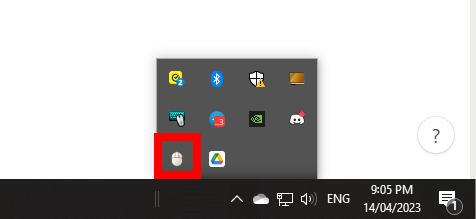
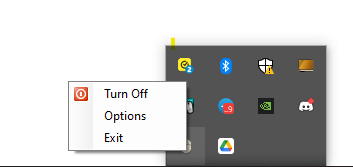
To open the Auto Mouse settings, simply click on the icon. From there you can toggle Auto Mouse on or off, open the options dialog or exit.
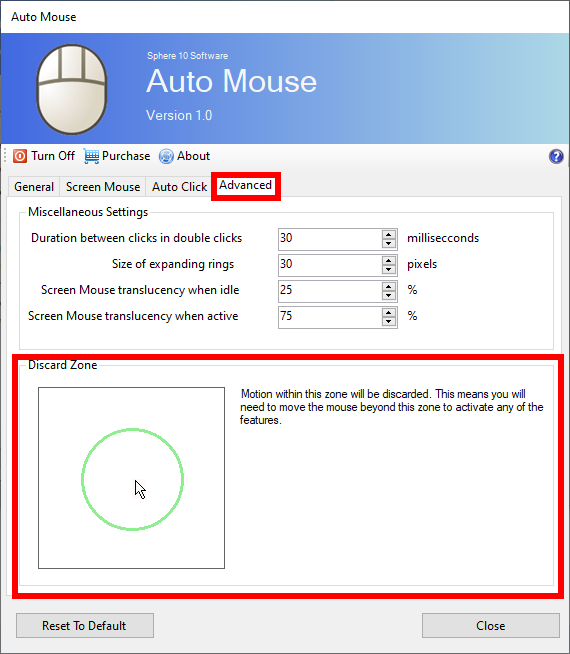
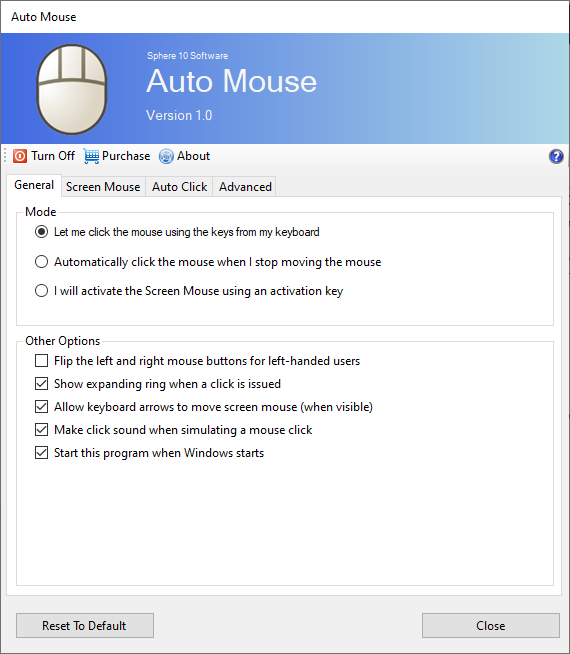
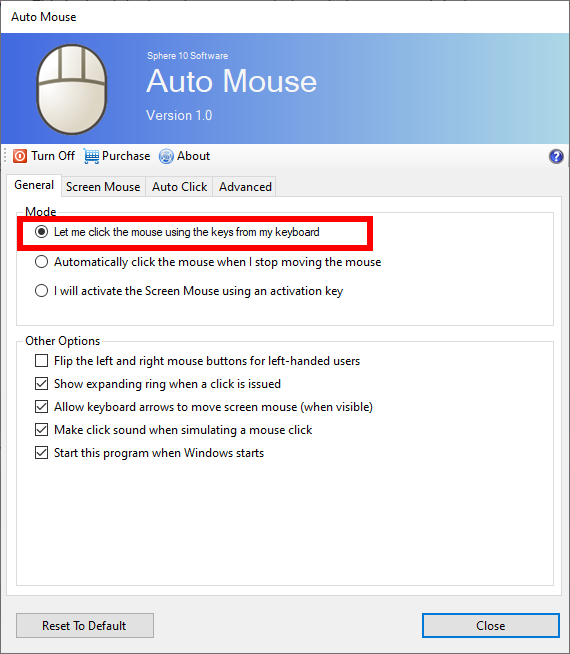
The options dialog allows you to configure all of Auto Mouse’s settings.
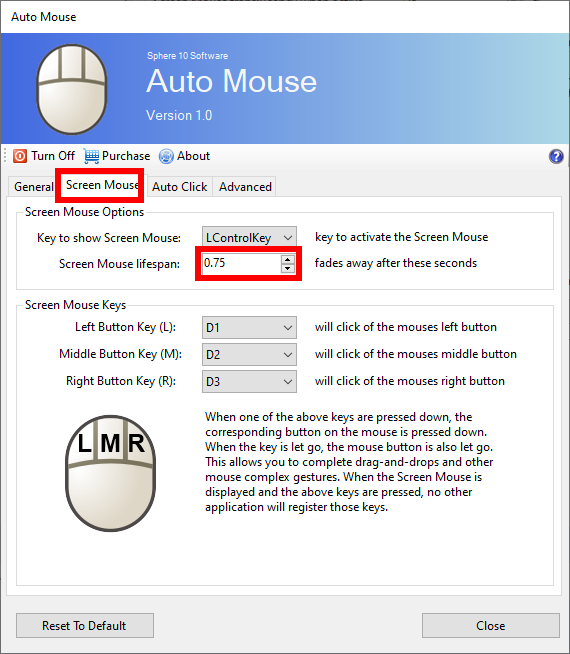
Screen Mouse
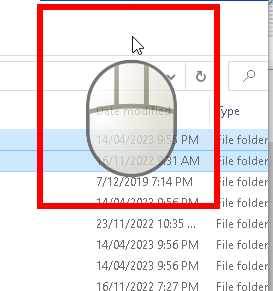
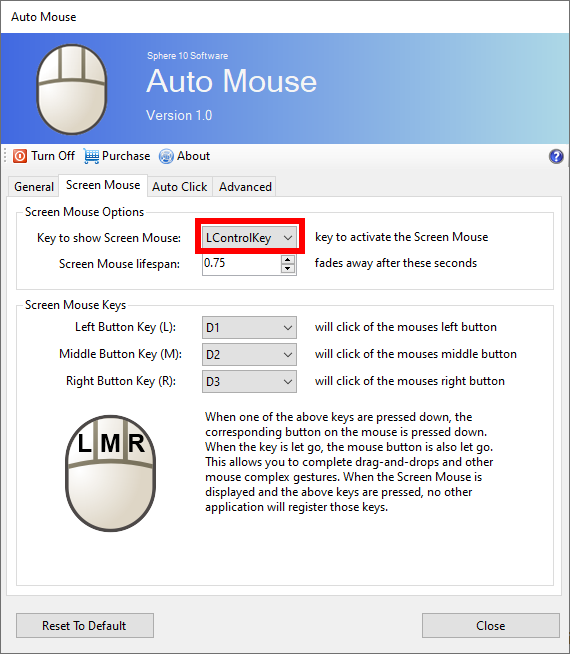
The main feature of Auto Mouse is the “Screen Mouse”. The Screen Mouse is a virtual mouse that hovers just below the mouse cursor as you move it around your display.
When the Screen Mouse is visible it allows you to click your mouse using the keyboard. By default:
-
the
1key will click the left-button -
the
2key will click the middle-button -
the
3key will click the right-button.
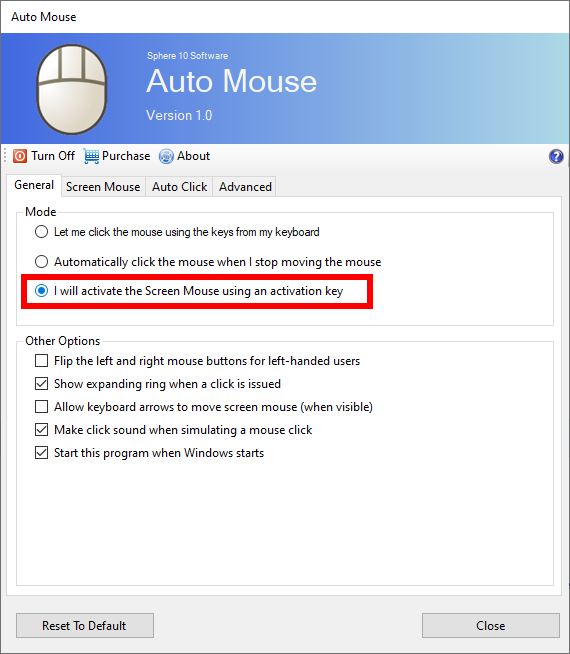
The Screen Mouse operates in 3 modes:
Mode 1 : Appear automatically as you move the mouse and disappear a short period after your mouse stops moving.
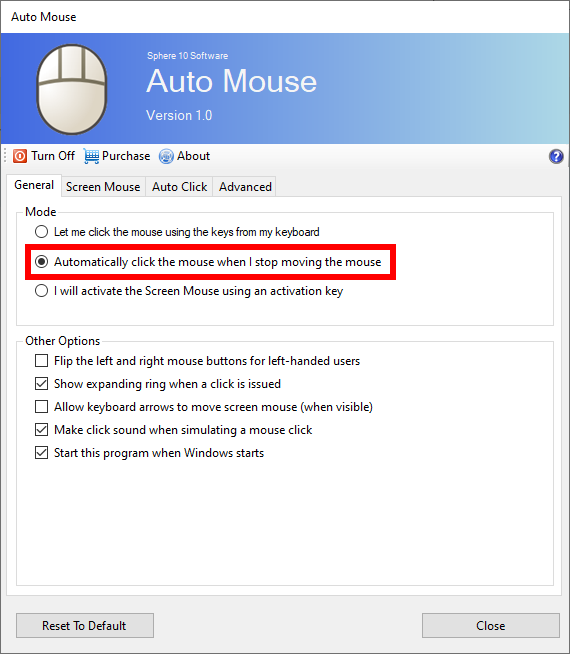
Mode 2: Does not appear at all but will automatically click when you stop moving the mouse.
Mode 3: Appears manually when you activate it with a key, and disappears with the same key.
-
When the Screen Mouse is visible it can be moved using the keyboard arrows (when this
setting
is enabled).
-
When a click is made using the Screen Mouse, it will display an expanding ring around the click area. This is a visual cue to alert the user that a click has been issued.
-
Alongside the visual cues, an audio cue is played.
Modes
Mode 1: Automatically show and hide the Screen Mouse
In this mode, the Screen Mouse appears automatically after you move the cursor a certain distance. The Screen Mouse then disappears after you stop moving your mouse for a certain period of time. During the period that the Screen Mouse is visible, you can click the mouse using the configured button keys. During the period the Screen Mouse is visible you can click as much as you want. This is the default and recommended mode for users as it is the most powerful and less obtrusive way to use your mouse.
To enable this mode, use this option:
To configure the minimum distance required before showing the Screen Mouse, use this option:

To configure the time the Screen Mouse is visible after it stops moving, use this option:
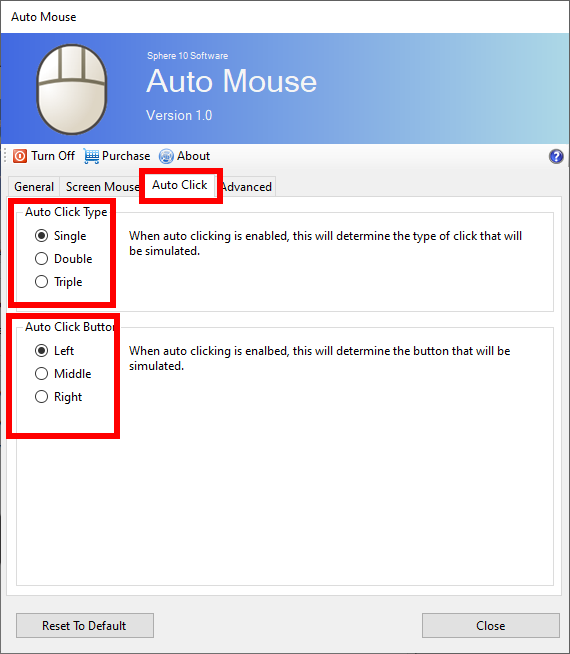
To configure the click issued in this mode, use this option:

Mode 2: Make a click when the mouse stops moving
In this mode the Screen Mouse does not appear at all but a click is issued at the point where the cursor stops moving.
To enable this mode, use this option:
To configure the minimum distance required before showing the Screen Mouse, use this option:
To configure the click issued in this mode, use this option:
Mode 3: Manually show and hide the Screen Mouse
In this mode, the Screen Mouse is manually shown and hidden by the user by using a key. Once the Screen Mouse is visible, the user can then click the mouse using the keyboard keys (just as in mode 1). The user will then manually de-activate the Screen Mouse to restore the keys.
To enable this mode select:
To configure the key used to manually show and hide the Screen Mouse, use this option.
To configure the click issued in this mode, use this option:
To configure the minimum distance required to move before a click is issued, use this option.